The idea of climbing a mountain can be exciting yet intimidating at the same time. You know that there’s a rewarding view and scenery when you get to the top, but you’re worried about the whole process and the climb itself.
How do you prepare? What should you expect? Any dos and don’ts? Don’t fret. We’ve rounded up these important tips for mount Kenya climbing beginners!
Proper Preparation
Preparation is key for any mountaineering trek. Here is how to prepare for climbing Mount Kenya.
They include;
- Stretch Before the Climb
Nothing like stretching to get you pumped up and warm up your muscles for the hours of hiking that lies ahead of you! Try doing dynamic stretches instead of static stretches.
Dynamic stretches require you to move through the stretches instead of holding them for 10 seconds, which is what you would do in static stretches. Examples of dynamic stretches are alternating knee lift, squat to hip flexor, alternating high kicks, torso twist, and alternating quad stretch.
- Jog or Do Cardio Before you Climb
This is how you can condition your body and build your stamina for the uphill climb. This is really important especially if you don’t usually work out, because you don’t want to shock your body of the exertion it’s to going to go through.
Make sure to jog a few times in the weeks leading to your climb.
- Read about Mount Kenya Before you Climb
This is necessary because it’s best to know about the features specific to the trail, like the presence of limatic (blood leeches), river or waterway crossing and wading, availability of water source, entrance fees, etc.
- Waterproof your Things Whether Rain or Shine
Even if it doesn’t rain, you never know if you’re going to run into a puddle or stream that you have to cross, or worse, might slip into. Don’t just protect yourself; protect your things too by using waterproof materials.
- Carry Some Water
You can’t afford to become dehydrated by the climb. Dehydration can give you fatigue, headache, and even confusion. It’ll be hard to find a source of fresh and clean water too. Bring your own water and make sure you drink up when you need to. You don’t want to be a burden to your fellow climbers if ever you start getting dizzy due to dehydration!
- Bring Snacks High in Carbs and Protein
Remember that physical exercise’s main fuel is carbohydrate. You’re going to burn a lot of carbohydrates and fats on your hike, and you can’t lose too much because you’ll run out of energy before the whole thing is over.
Focus on keeping your body supplied with enough carbs to optimize your performance. Pack some trail mix, nuts, candies, bread, etc.

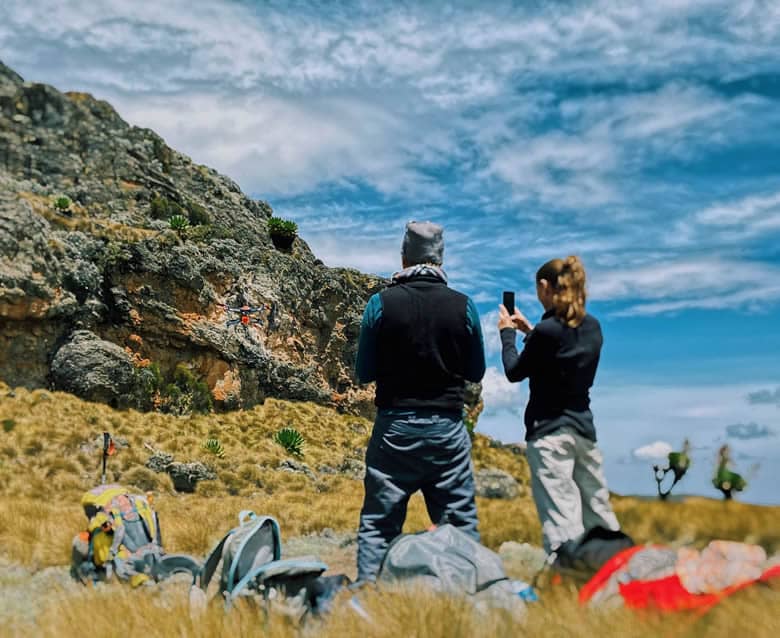
Proper Hiking Gear and Equipment
Check the gear that you’ll need for the route you’re planning. Make sure that everything is in good working condition – even go try it out beforehand if you need to.
Don’t pack too much gear if you can help it, since this will make your pack super heavy, making your going much tougher than it needs to be.
Check that your clothes are suitable for the trek as well. Clothes should be breathable for high exertion, but you should also pack something fleecy to keep you warm at night an something wind and water proof to keep you warm and dry if you do get stuck in the rain. Socks should be comfortable and thick enough to prevent blisters.
- Pack a map and compass and make sure that you know how to use them. Using a GPS is fine and much easier than using a map, but you could run out of battery and get seriously lost.
- Take a flashlight and spare batteries. This should be logical. A headlamp is the easiest and most practical option for a flashlight.
- If you’re overnighting and planning to cook your own food on the way, take waterproof matches. And alternative to this is a flint kit.
- A penknife, like a Swiss army knife, and a whistle are also really useful tools. In case of emergency, use the whistle to attract attention. The international signal for distress is six blasts, repeated every minute.
Professional Trained Team
Well-trained guides know the terrain and weather so well, they know how to read the conditions and anticipate danger, as well as how to handle emergencies and make the proper decisions when there is a risk.
Hiring an experienced guide will save you time and ensure you find the best spots. Not only do they know the terrain like the palm of their hand, but they also know how the weather behaves, and they have a network of people in their field of work with whom they exchange knowledge.
Furthermore, they will be able to assist you in terms of equipment and acclimatization, which is essential at high altitudes.
Professional mountain guides are very knowledgeable and people friendly. They are used to engaging with people from all over the world and sharing their passion with them. This makes them a great company on outdoor adventures.
Carry First Aid Kit
Basic medicines, Band-Aids, cotton, betadine, and anything you think you might need will be worth their weight in gold if ever something bad comes up. This is a golden rule. Don’t ever forget to bring your first aid kit!
Mountain Climbing Emergencies Prep & What to do
Here are some things to keep in mind if you do have an emergency situation:
- Keep calm. Rushing things could make the situation much worse.
- Assess the condition of the person who’s injured. Can they be evacuated by the group, or do you need extra assistance?
-
- If you have reception, you can call for help. If you don’t have reception, someone (preferably two people, if your group is large enough) will have to hike to where you would have reception or can get help. Make sure that you write down the location and description of where the injured person is, since this will make it much easier for a rescue team to get there. Along with this, write down the nature of the injury, helping the rescue team come prepared for whatever they will find.
- If you suspect that the injured person sustained spinal injuries, don’t move them at all. If that’s not the case, move them to shelter as best you can. In either case, protect the person against the elements and keep them well hydrated. This will aid the rescue and recovery process.
- Don’t go too far from the route you’re taking, since this is where the rescue team would come looking for you. If you need to move far away in order to find shelter, leave a sign indicating where you went.
- Take your phone with you, sealed in a waterproof bag. Also take hand-held radios, since this would enable you to communicate with the rest of your group if you are out of sight of each other. If you tune into the correct frequency, you’d be able to contact the local mountain rescue team as well.
-
- Pack a first aid kit and know how to use it. It’s definitely a benefit to go for basic first aid training, not just for trekking, but also in daily life.
Conclusion
Preparation and proper planning is essential if you want to be a successful mountaineer. Take your route, the terrain and your own limitations into account when planning and preparing.


